5 Best Strength Exercises for Women To Get Rid of Stubborn 'Bra Rolls'
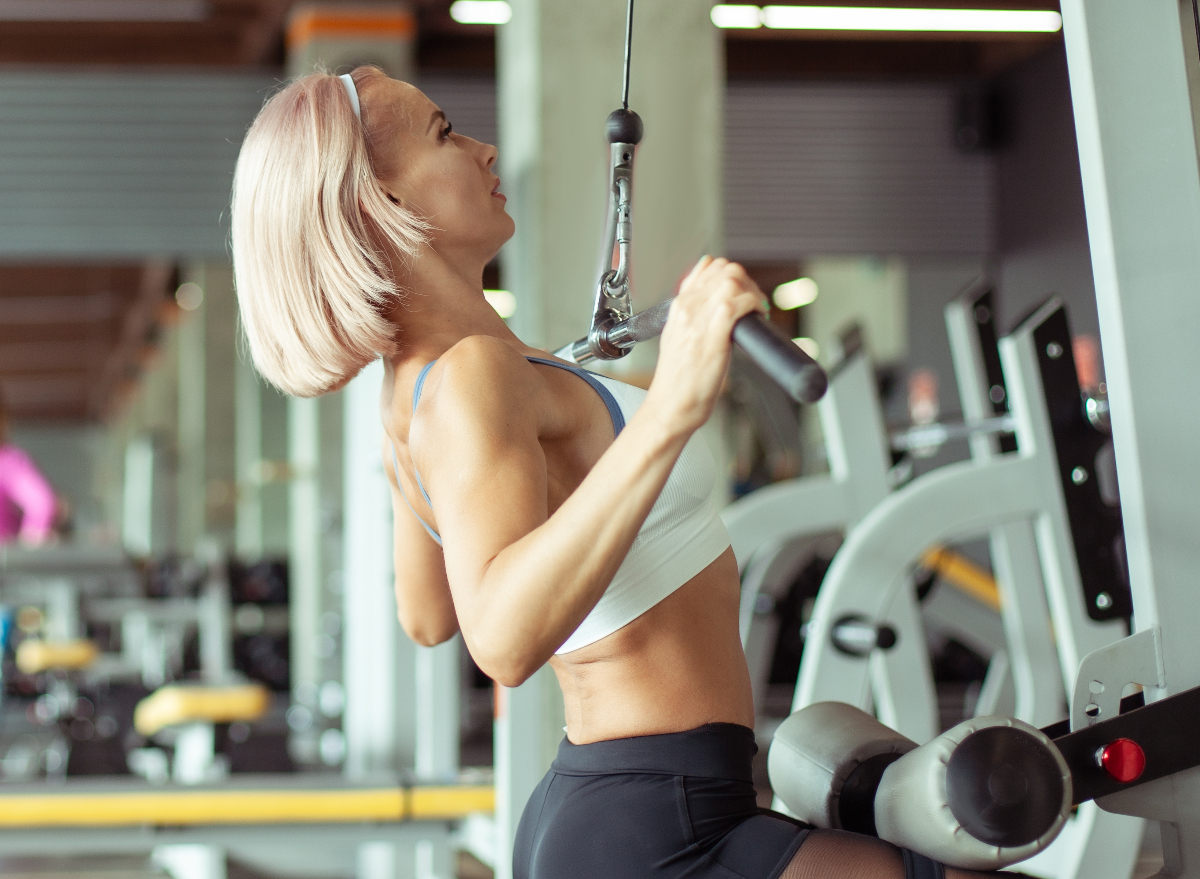
Shopping for new bras can be so much fun. That is, until you try them on, look in the mirror, and see those pesky "bra rolls" sitting under the strap. The struggle can be real when you're dealing with stubborn creases and fat that fold over your bra straps. But rest assured, there are certain exercises you can do in order to melt, tighten, and tone the excess fat that's apparent when you're wearing a bra.
It's important to note that you can't spot reduce fat; fat loss occurs throughout your whole body. That being said, sculpting muscle is a proven way to melt pesky body fat, including bra rolls. So when you're looking to work on a certain area of your body, Tonal coach Ash Wilking, NASM-Certified Personal Trainer and Certified Functional Strength Coach (CFSC), says you should focus on movement patterns that specifically engage that area. In the case of bra rolls, you'll want to consider the joints that surround your back, along with the muscles that help move those joints.
"Think about it as a reverse dart game," Wilking says. "We have the bullseye we want to work, but that bigger circle surrounding it is actually where we can aim! Upper-body or back workouts can be individual gym sessions or combined with push/pull formatting or full-body programs."
Below, Wilking shares five strength exercises for women to get rid of bra rolls. These moves target the back and are part of a two-block routine. Rest for short durations during each exercise, and take a breather between sets for 60 seconds.
"This isn't like a regular HIIT workout … It's a cool HIIT workout," Wilking exclaims. "Instead of 'heart beating out of your chest' HIIT, we'll target building muscle by stimulating that muscle burn!"
Block One
1. Neutral Lat Pulldowns (30 Seconds)
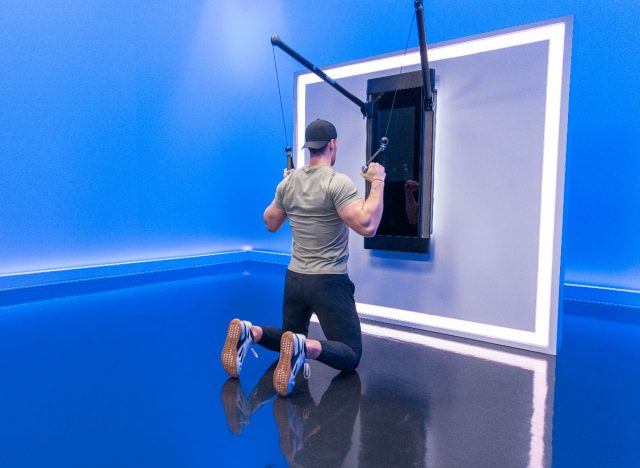
Wilking dubs the neutral lat pulldown the "OG of vertical pulling." She explains, "This big movement is going to target big muscles and in turn, help us see some big results. This exercise can be done seated as well as in a tall kneeling position, as you see pictured. With a barbell or with individual handles, you'll absolutely feel the burn with this one."
To begin, lengthen your arms overhead. Activate your lats as you bring your elbows down toward the ground as if you're "tucking them into your back pockets." If you're working with a barbell, your palms will remain facing ahead of you; if you're utilizing a handled set-up, your palms should be turned in. Brace your core, and use control to bring the weight back to the position you started in with fully extended arms.
2. Half-Kneeling Single-Arm Pulldowns (20 Seconds Per Side)
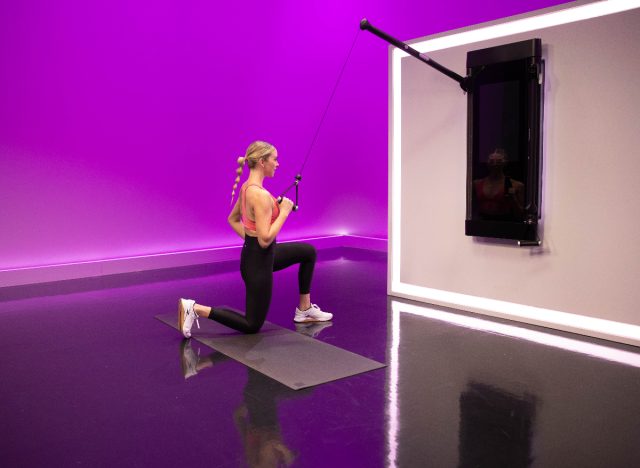
This twist on your typical lat pulldown offers more anti-lateral flexion and keeps your torso stability diverse. "You get to work your back and we add in a bunch of core work," Wilking says. "As if that isn't bonus enough, this exercise adds an overhead stretching component, which down the road, helps us with any overhead reaching movements. Let's be honest: We all need a little more shoulder mobility, so a 'forced' stretch helps with that."
To begin, set up the resistance above your head, a bit in front of you. Grab onto the handle with one hand, and assume a half-kneeling position. Make sure the knee opposite the handle is the one that's in front of you. Your palm should face inward and your arm should be extended. Then, pull the handle down to your shoulder. Your goal should be to bring your elbow in the direction of the ground by your hip. Your core and glutes should remain activated as you bring the weight back to the start position.
3. Standing Face Pulls (20 Seconds)
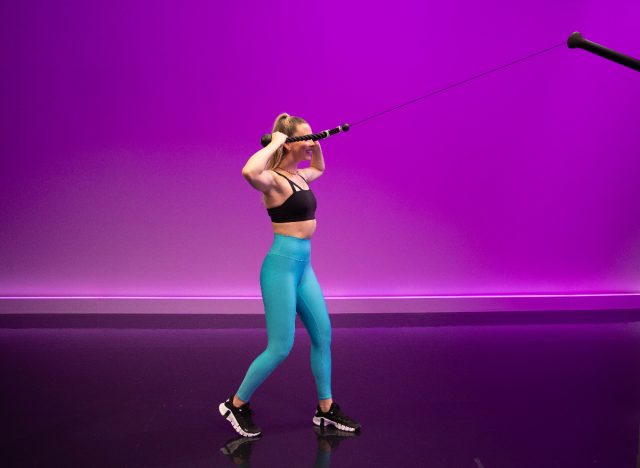
As far as standing face pulls are concerned, Wilking says, "No sugar coating it here, this one is funky and tough! But when it comes to shoulders they can be a little funky and we need to be strong and tough. As we aim to look at this back workout from a holistic point of view, we can't just target our lats. This will also help us engage our upper back and shoulders. No muscles left behind here."
To set up, make sure a double grip rope is connected to the overhead resistance. Lengthen your arms, and bring your palms inward to grab the ends of the rope. Assume a split stance for extra stability. Your shoulders should be down as you bring your elbows back to the height of your shoulders. Your goal should be to bring your fists to the sides of your ears. Using control, lengthen your arms back to the start position.
Block Two
1. Half-Kneeling Alternating Overhead Presses (30 Seconds)
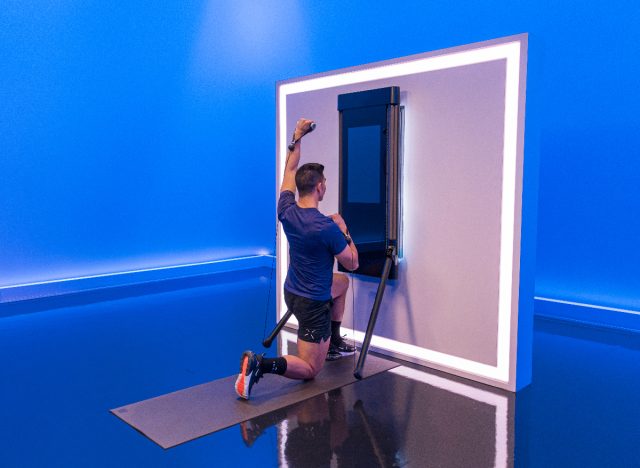
Get ready for another half-kneeling exercise to kick off block number two. "Remember when we talked about winning? This one is a catch-all, not only for shoulder and overhead strength, but we also get core work and some hip mobility. The over-pressing pattern will help challenge or shoulder and movement in the scapula," Wilking explains.
Begin this exercise by assuming a half-kneeling position and keeping the resistance at a low angle on both sides. Your back toe should be tucked, and you should hold the handles in a racked position with bent arms and neutral palms (facing in). Press one arm up and above your head until it's fully extended. Rotate your palm so that it faces ahead of you. Make sure your torso is kept straight by activating your core muscles, and bring the weight back to the start position. Repeat on the other side, and continue to alternate.
RELATED: A Trainer's 30-Day Countdown to Firm, Sculpted Arms
2. Lateral Raises (20 Seconds)
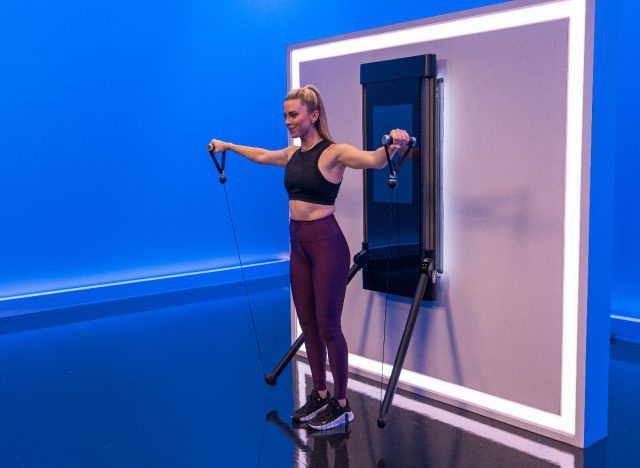
Last but not least, these strength exercises for women to get rid of bra rolls end with lateral raises. "This exercise is going to help isolate the deltoids (think of this muscle like shoulder pads in a fabulous 80s blazer)," Wilking tells us. "We're already targeting the main pull muscles in the back, so this final move in our workout is going to give us that final burn with isolation. I know we don't like to be alone, but sometimes our muscles, just like us introverts, need a little 1:1 time."
Begin by keeping the resistance at a low angle on each side. Stand tall with a slight bend in your knees. Engage your core. While keeping your elbows soft and your shoulders down, raise your arms out to each side until they're at the height of your shoulders. Your body should form a "T." Use control to lower back to the start position.


