Melt Belly Fat in 30 Days With This Walking & Strength Workout
As a tenured performance coach, I've seen firsthand how combining strength training with cardio can help clients achieve their weight-loss goals. While you can't specifically target fat loss in one area—like the belly—with the right mix of exercises and a healthy diet, you can make significant strides toward a leaner, stronger body. So, I've curated the ultimate 30-day interval walking and strength workout for belly fat.
Strength training builds muscle, which increases your metabolism, while cardio, like interval walking, helps burn calories and improve cardiovascular health. This combination creates an ideal environment for fat loss.
This 30-day workout plan is designed with those principles in mind, blending strength days with walking intervals to challenge different energy systems, boost metabolism, and optimize fat burning. All you need are some basic pieces of equipment—dumbbells and a slam ball—and your commitment to the routine.
These workouts, which are effective for all fitness levels, will help you build muscle and endurance while inching closer to your weight-loss goals. Stick to the plan, and in 30 days, you'll feel stronger, fitter, and one step closer to melting away stubborn belly fat.
What To Expect with the Strength and Walking Workouts

Combining strength training and interval walking offers a balanced approach to fat loss and muscle toning. Each week, you'll perform three strength workouts targeting different muscle groups—upper body, lower body, and full body. These workouts incorporate multi-joint movements like squats, rows, and thrusters, which build muscle and keep your heart rate elevated, leading to a higher calorie burn.
On alternate days, you'll focus on interval walking, varying the intensity and duration of your walks to challenge your cardiovascular system. HIIT-style, long-timed, and distance-based intervals will boost your metabolism and burn fat efficiently. This blend of strength and cardio creates an optimal environment for fat loss while improving muscle definition and endurance.
How To Progress the Workouts Week to Week

To see consistent progress over the 30 days, gradually increase the intensity and volume of your strength and walking workouts. In the strength sessions, start with a moderate weight that challenges you but allows you to maintain good form. Aim to slightly increase the weight each week or add a few more reps to each set. By progressively overloading your muscles, you'll build strength and muscle tone.
You can increase the duration of the fast-paced sections or the workout's overall length for the walking intervals. For example, in Week 2, you might add an extra interval or extend your fast walking time from 1 to 1.5 minutes. By making these minor adjustments week by week, you'll avoid plateaus, continue to burn fat and improve fitness throughout the month.
The 30-Day Interval Walking and Strength Workout To Melt Belly Fat
Day 1: Upper-body Strength Workout
What You Need: A set of dumbbells and a mat. This workout will build upper-body strength and improve core stability, taking 30–40 minutes to complete. Ensure you have enough space to move freely and perform each exercise with a full range of motion.
The Routine:
- Single-arm Dumbbell Row (3 sets of 12 reps per side)
- Dumbbell Incline Bench Press (3 sets of 8 reps)
- Dumbbell Lateral Raises (3 sets of 15 reps)
- Bicycle Crunches (3 sets of 10 to 15 reps per side)
- Side Plank + Hip Dips (3 sets of 10 to 15 reps per side)
Directions: Complete each exercise with the prescribed sets and reps. Rest 30 to 60 seconds between sets and 1 to 2 minutes between exercises. Focus on quality movements, maintaining good form throughout each repetition. Adjust weight if needed to ensure you're working within your capacity but still challenged.
How To Do It:
1. Single-arm Dumbbell Row
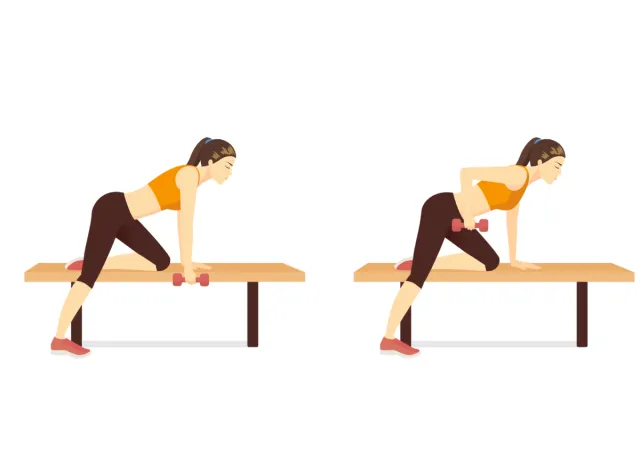
- Grab a dumbbell with one hand, and place your opposite hand and knee on a bench for support. Your torso should be parallel to the ground, with a neutral spine.
- Begin with the dumbbell in your free hand extended toward the floor, arm entirely straight.
- Engage your core by pulling your belly button toward your spine.
- Keeping your elbow close to your body, pull the dumbbell toward your hip, squeezing your shoulder blade at the top of the movement.
- Ensure your back remains straight, and avoid twisting your torso.
- Slowly lower the dumbbell back to the starting position, fully extending your arm. Maintain control throughout the descent.
- Avoid using momentum to lift the dumbbell. Focus on the muscles in your back to do the work.
- Repeat all reps on one side before switching.
2. Dumbbell Incline Bench Press
- Adjust a bench to a 30–45-degree incline.
- Hold a dumbbell in each hand.
- Lie on the bench with your feet flat on the ground, and position the dumbbells just outside your shoulders, elbows bent at 90 degrees.
- Press both dumbbells above your chest, extending your arms fully without locking out your elbows.
- Keep your palms facing forward and maintain control of the weights.
- Lower the dumbbells slowly by bending your elbows, allowing the weights to come down just below chest level. Your elbows should stay at a 45-degree angle to your torso.
- Push the dumbbells back up to the starting position, focusing on using your chest muscles to press the weights.
- Exhale as you push up and control the movement.
Notes:
- Keep your core tight and back pressed into the bench to avoid arching.
3. Dumbbell Lateral Raises
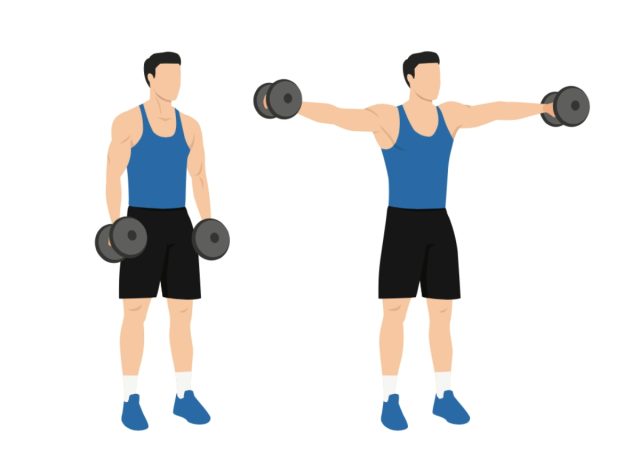
- Stand tall with your feet shoulder-width apart, holding a dumbbell in each hand by your sides.
- Keep your core braced and shoulders relaxed.
- With your elbows slightly bent, raise your arms out to the sides until they reach shoulder height.
- At the top of the movement, your palms should face the floor.
- Pause momentarily at the top, ensuring your arms are parallel to the ground. Keep your shoulders down and away from your ears.
- Slowly lower the dumbbells back to your sides, controlling the descent. Don't let gravity take over—focus on the muscles in your shoulders doing the work.
Notes:
- Avoid shrugging your shoulders during the movement.
- If you feel tension in your neck, check your form and lower the weight if necessary.
4. Bicycle Crunches
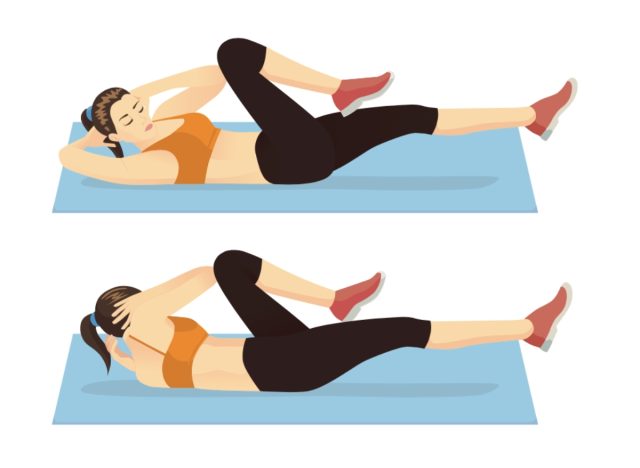
- Lie flat on your back with your hands lightly supporting your head.
- Lift your feet off the floor and bend your knees to a 90-degree angle.
- Engage your core and extend one leg straight out while twisting your torso to bring your opposite elbow toward the bent knee. Don't pull on your neck—use your abs to rotate.
- Switch sides by extending the other leg and bringing the opposite elbow to the opposite knee in a pedaling motion.
- Continue alternating sides controlled, maintaining tension in your core throughout.
- Perform 10–15 reps per side, making sure to breathe evenly.
Notes:
- Keep your lower back pressed into the floor to avoid arching and straining your spine.
5. Side Plank + Hip Dips
- Start in a side plank position with your elbow directly beneath your shoulder, legs extended, and feet stacked. Keep your body in a straight line from head to heels.
- From the side plank position, lower your hips toward the ground in a controlled manner while maintaining tension in your core.
- Press your hips back up to the starting position, squeezing your obliques as you lift.
- Repeat for 10–15 reps on one side before switching to the other side.
- Make sure your body stays aligned throughout the movement.
- Keep your hips stacked and avoid letting your body twist forward or backward.
Notes:
- If needed, modify by staggering your feet or placing your top hand on your hip for added stability.
Day 2: Interval Walking Workout – HIIT Style
This high-intensity interval training (HIIT) workout alternates between fast-paced walking and recovery periods to boost metabolism and burn fat.
Duration: 20-30 minutes
How To Do It:
- Warm-up: 5 minutes of brisk walking (RPE 4-5)
- Intervals: Alternate between:
1 minute of fast walking or light jogging (RPE 7-8)
1 minute of slow walking for recovery (RPE 3-4) - Cool-down: 5 minutes of slow walking to bring your heart rate down (RPE 3)
Total Rounds: 10-12 intervals (adjust based on your fitness level)
Day 3: Lower-body Strength Workout
What You Need: A set of dumbbells and a mat. This lower-body strength workout builds muscle and improves core stability. It will take approximately 30–40 minutes to complete. Be sure to have enough space to perform all exercises with a full range of motion and proper form.
The Routine:
- Goblet Squat to Lunge (3 sets of 6 reps)
- Dumbbell Deadlift (3 sets of 12 reps)
- Front Rack Lateral Lunge (3 sets of 8 reps per side)
- Dumbbell Glute Bridge (3 sets of 15 reps)
- Weighted Straight-leg Sit-ups (3 sets of 10 reps)
- Plank with Hip Dips (3 sets of 10 reps per side)
Directions: Complete each exercise for the prescribed sets and reps. Rest for 30–60 seconds between sets and 1–2 minutes between exercises. Focus on maintaining proper form and using a challenging weight that allows you to complete all reps with control. Adjust weight as needed to ensure a good workout without sacrificing technique.
How To Do It:
1. Goblet Squat to Lunge
- Stand with your feet shoulder-width apart and hold a dumbbell vertically at chest height, grasping it by the top end with both hands (goblet position).
- Perform a squat by bending at the hips and knees, lowering your body until your thighs parallel the floor.
- Keep your chest up and core engaged.
- Push through your heels to stand back up.
- Immediately step back into a reverse lunge, lowering your back knee toward the floor.
- Return to standing and repeat the sequence by squatting.
- Step back with the opposite leg into a lunge.
- Alternate legs with each lunge.
Notes:
- During the squat and lunge, keep your weight evenly distributed through your feet.
- Avoid letting your knees cave inward.
2. Dumbbell Deadlift
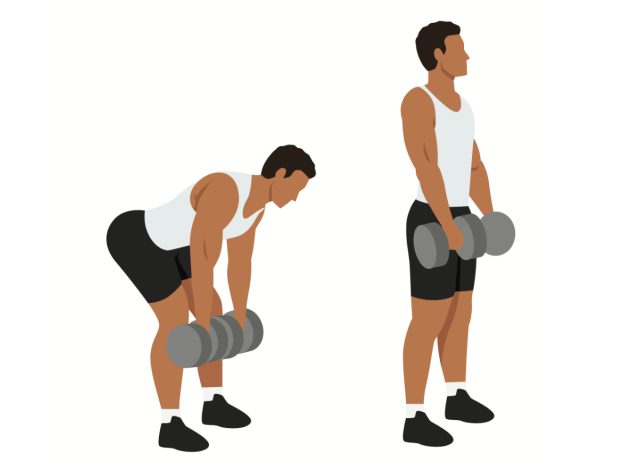
- Stand with your feet hip-width apart.
- Hold a dumbbell in each hand at arm's length in front of your thighs, palms facing your body.
- Hinge at your hips, pushing them back as you lower the dumbbells along your shins. Keep your back flat and knees slightly bent.
- Lower the dumbbells until your torso is almost parallel to the floor.
- Squeeze your glutes and hamstrings to return to a standing position.
Notes:
- Keep the dumbbells close to your body as you lift, avoiding rounding your back.
- Maintain a tight core throughout the movement.
- Focus on engaging your hamstrings and glutes during the upward phase.
- Don't let your shoulders roll forward at the bottom of the movement.
3. Front Rack Lateral Lunge
- Hold a dumbbell in each hand at shoulder height with your elbows bent, palms facing in (front rack position).
- Stand with your feet together.
- Take a big step out to the side with one leg, keeping the other leg straight.
- As you step, lower your hips into a lunge, bending the knee of the stepping leg.
- Push through the heel of your lunging leg to return to the starting position.
- Repeat for all reps on one side before switching to the other side.
Notes:
- Keep your chest up and engage your core to maintain balance.
- Make sure your lunging knee tracks over your toes.
4. Dumbbell Glute Bridge
- Lie on your back with your knees bent and feet flat on the floor, hip-width apart.
- Hold a dumbbell with both hands on your hips.
- Squeeze your glutes and lift your hips toward the ceiling, forming a straight line from your knees to your shoulders.
- Hold at the top for a moment, then lower your hips back to the floor with control.
- Complete all reps, focusing on squeezing your glutes at the top of each lift.
Notes:
- Keep your core engaged to avoid arching your lower back.
- If you feel strain in your lower back, adjust your foot position or reduce the weight.
5. Weighted Straight Leg Sit-ups
- Lie on your back with your legs extended straight on the floor.
- With both hands, hold a dumbbell against your chest.
- Engage your core and sit up, lifting your upper body toward your thighs.
- Keep your legs straight and grounded throughout the movement.
- Slowly lower yourself back down to the starting position, controlling the movement with your abs.
- Repeat for all reps, keeping tension in your core throughout.
Notes:
- Avoid using momentum to sit up.
- Focus on engaging your core muscles to lift your torso.
6. Plank with Hip Dips
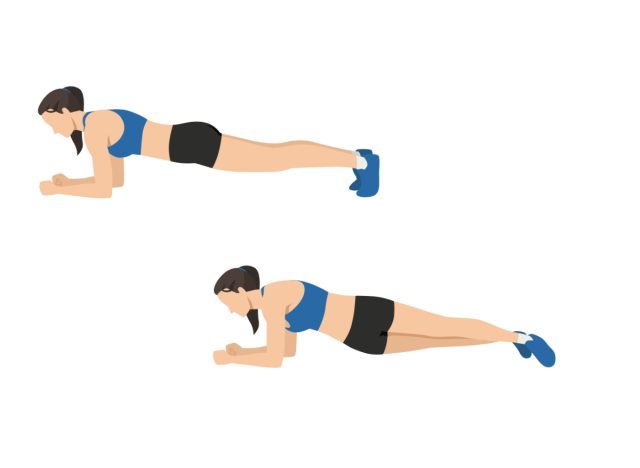
- Start in a forearm plank position with your elbows directly under your shoulders and your body in a straight line from your head to your heels.
- Lower one hip toward the floor by rotating your torso slightly while keeping your feet and shoulders in place.
- Return to the plank position, then lower the opposite hip toward the floor.
- Continue alternating sides.
Notes:
- Keep your core tight throughout the movement to avoid sagging in your lower back.
- Move slowly and with control to maximize core engagement.
- If needed, modify by performing the exercise from your knees.
Day 4: Interval Walking Workout—Long, Timed Intervals
This workout focuses on maintaining a faster pace for longer durations to build endurance and stamina.
Duration: 25-35 minutes
How To Do It:
- Warm-up: 5 minutes of brisk walking (RPE 4-5)
- Intervals: Alternate between:
3 minutes of fast-paced walking (RPE 6-7)
1 minute of slow walking for recovery (RPE 3-4) - Cool-down: 5 minutes of slow walking (RPE 3)
- Total Rounds: 6-8 intervals
Day 5: Full-body Strength Workout
What You Need: A slam ball, dumbbells, a barbell, and a mat. This full-body workout targets multiple muscle groups for overall strength development. Expect to complete this workout in about 30–40 minutes. Ensure you have enough space and equipment to perform all movements with a full range of motion.
The Routine:
- Slam Ball Front Slam (4 sets of 5 reps)
- Dumbbell Thrusters (3 sets of 8 reps)
- Barbell Hip Thrusts (3 sets of 12 reps)
- Dumbbell Curls (3 sets of 15 reps)
- Leg Lowerings (3 sets of 15 reps)
Directions: Perform each exercise for the prescribed sets and reps. Rest for 30–60 seconds between sets and 1–2 minutes between exercises. Focus on form, maintaining control throughout each movement. Adjust weights as necessary to challenge yourself without compromising technique.
How To Do It:
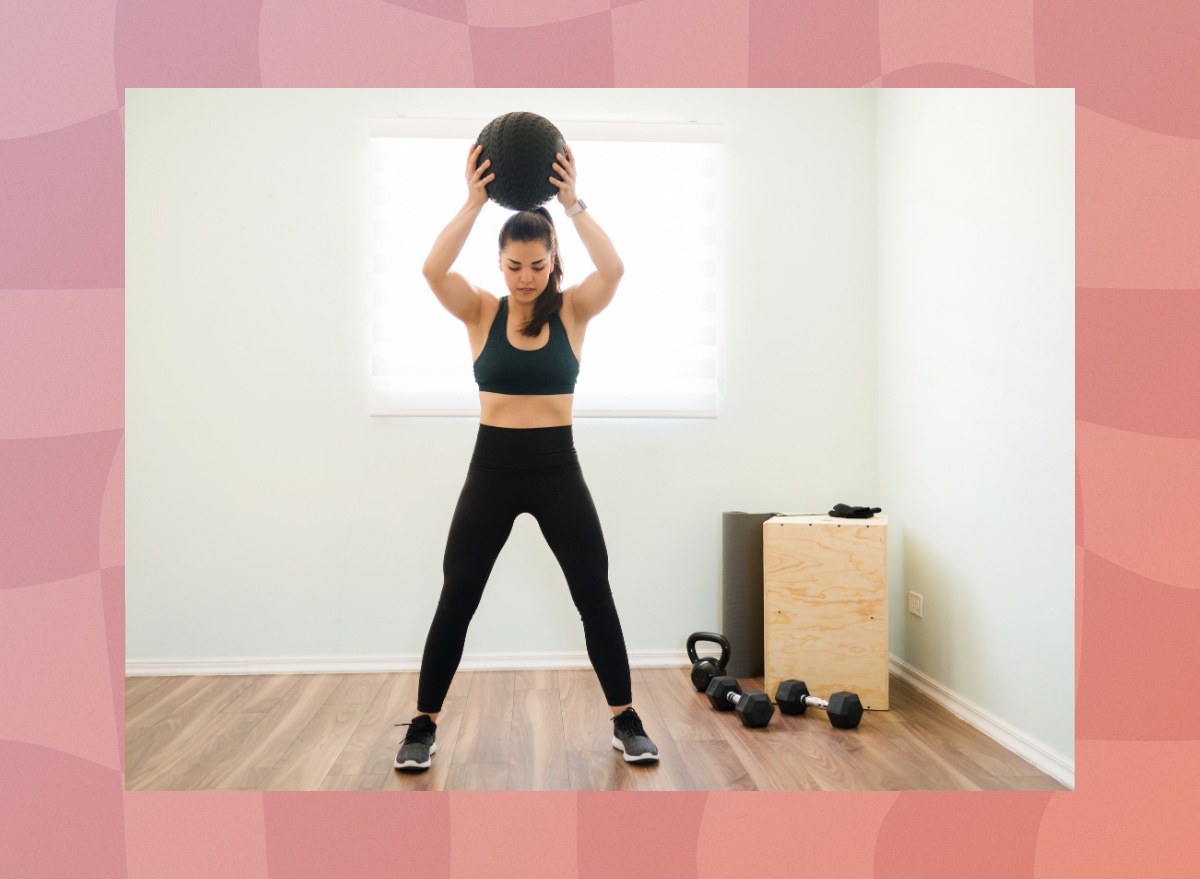
1. Slam Ball Front Slam
- Stand with feet shoulder-width apart, holding a slam ball at chest height with both hands.
- Engage your core and keep your knees slightly bent.
- Raise the ball overhead, fully extending your arms while maintaining a solid core.
- Slam the ball forcefully onto the floor before you, hinging slightly at the hips. Follow through with your arms and body.
- Pick up the ball and repeat for the remaining reps.
Notes:
- Focus on engaging your abs and using your whole body for power.
- Avoid rounding your back when picking up the ball.
2. Dumbbell Thrusters
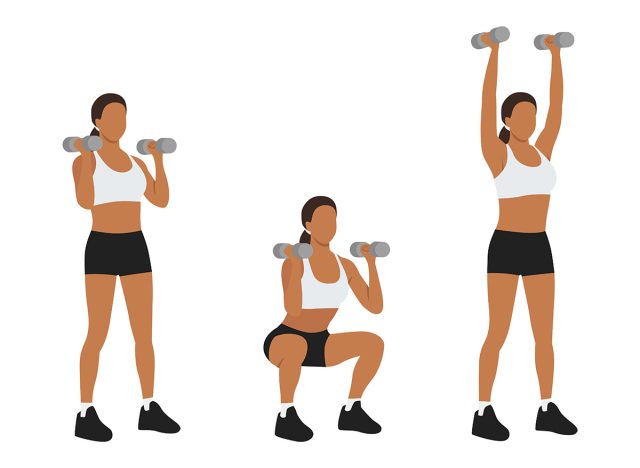
- Stand with your feet shoulder-width apart, holding a dumbbell in each hand at shoulder height, elbows bent, and palms facing in.
- Lower into a squat by bending your knees and pushing your hips back, keeping your chest lifted.
- As you drive up from the squat, press the dumbbells overhead in one fluid motion.
- Lower the dumbbells back to shoulder height as you descend into the next squat.
- Repeat.
Notes:
- Maintain a tight core and avoid letting your knees collapse inward as you squat.
3. Barbell Hip Thrusts
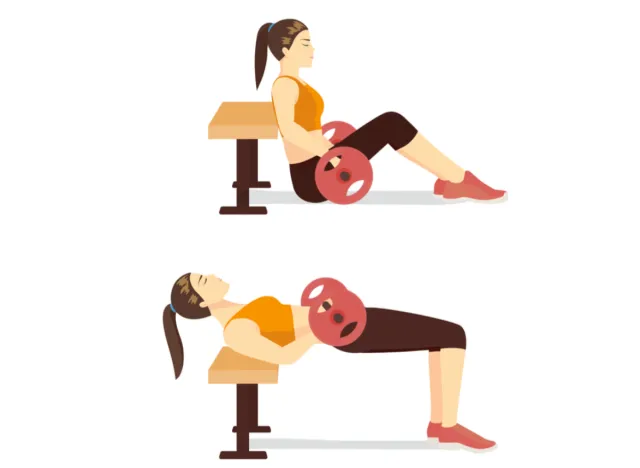
- Sit with your upper back against a bench, legs bent, and a loaded barbell positioned across your hips. Your feet should be flat on the floor, shoulder-width apart.
- Drive through your heels and lift your hips, pressing the barbell upward until your body forms a straight line from your shoulders to your knees.
- Squeeze your glutes at the movement's top and hold for a second.
- Lower your hips back down with control, keeping tension in your glutes.
Notes:
- Keep your chin tucked and avoid overextending your back at the top.
- Focus on a full glute contraction.
4. Dumbbell Curls

- Stand tall with your feet hip-width apart, holding a dumbbell in each hand.
- Your arms should be extended by your sides, and your palms should face forward.
- Curl the dumbbells toward your shoulders by bending your elbows, keeping your upper arms stationary.
- Squeeze your biceps at the movement's top, then slowly lower the weights back to the starting position.
- Repeat for the desired number of reps, keeping control throughout the movement.
Notes:
- Avoid swinging your body or using momentum.
- Focus on a slow, controlled curl.
5. Leg Lowerings
- Lie on your back with your legs extended straight up toward the ceiling and your arms by your sides or under your lower back for support.
- Slowly lower both legs toward the floor while pressing your lower back into the mat.
- Stop just before your lower back begins to lift off the mat, then raise your legs back to the starting position.
- Repeat for all reps, maintaining tension in your core throughout.
Notes:
- If lowering both legs is too challenging, lower one leg at a time or keep a slight bend in your knees.
- Keep your core engaged to protect your lower back.
Day 6: Interval Walking Workout—Distance Intervals
This workout uses distance-based intervals to break up your walking routine and keep your body guessing.
Duration: 30-40 minutes
How To Do It:
- Warm-up: 5 minutes of brisk walking (RPE 4-5)
- Intervals: Alternate between:
0.25 miles at a fast pace (RPE 7)
0.25 miles at a slow pace (RPE 3-4) - Cool-down: 5 minutes of slow walking (RPE 3)
- Total Distance: Aim for 2-3 miles
Day 7: Rest
Sign up for our newsletter!


